Showing posts with label dessert. Show all posts

11/23/2013

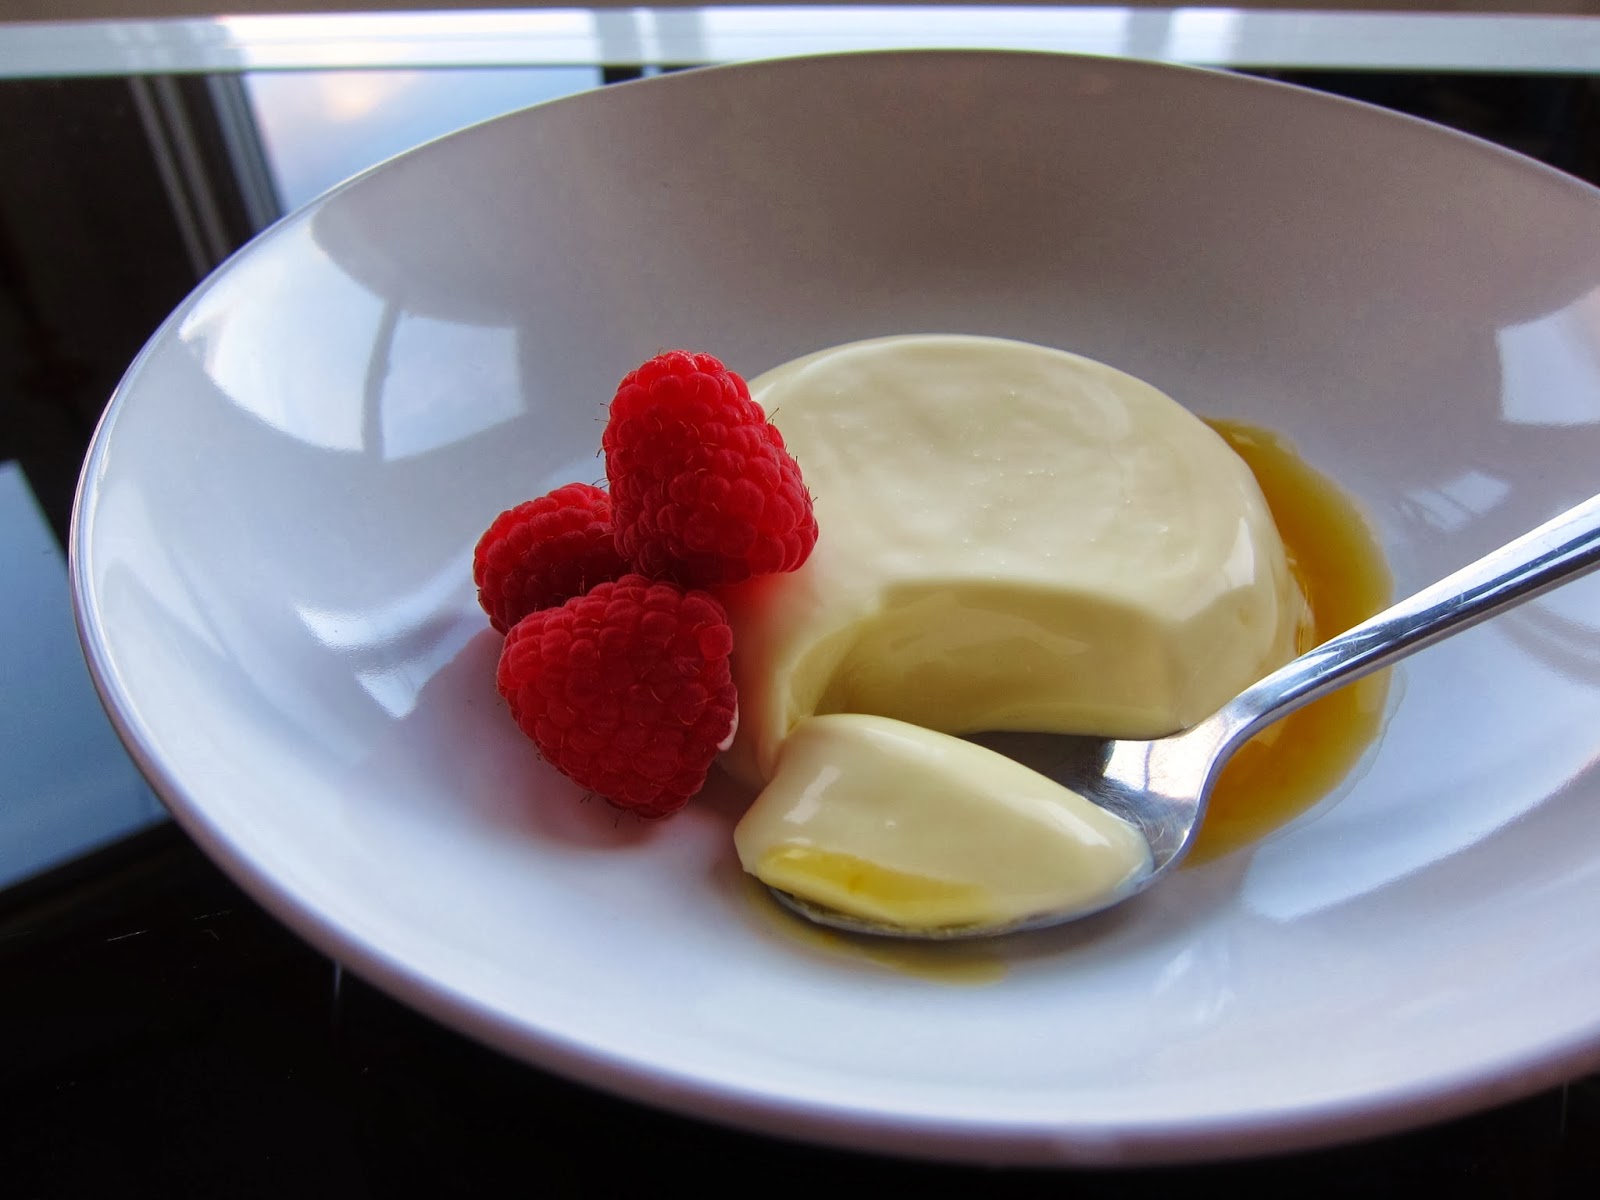
Farmers Market Finds II: Passion Fruit Panna Cotta

A sunny Saturday spent wandering the Ferry Building farmers market in SF yielded a fantastic discovery: fresh passion fruit! It's rare to find them in their fresh form, especially in the cities I've lived in; they often show up in tropical juice blends and in frozen form. California's fresh produce really is second to none. It was a nice surprise and exactly the inspiration I'd been missing for the past few months.

Passion fruit has a syrupy, tropical aroma-- it's hard to describe. While the pulp smells sweet, it's very sour, so it works best in creamy applications. It also has many hard black seeds which are edible, but not pleasant to chew on. Passion fruit is typically used in desserts (mousses, ganache, and panna cotta), but I recently had passion fruit-browned butter carrots at the newly opened TBD restaurant; I didn't know carrots could taste so good. 

The last time I made panna cotta, the recipe called for gelatin sheets. This one uses powdered gelatin which is much easier to find. I think passion fruit is my new favourite panna cotta flavour. The tropical fruitiness balances the smooth and creamy dessert perfectly. I wish passion fruit were easier to find, but I guess the rarity makes it a special treat.

Recipe after the jump!


7/14/2013

Bittersweet Chocolate Soufflé


While fluffy, warm and completely delicious, soufflé has an unfortunate reputation of being extremely temperamental to prepare. It's probably because of the perceived fragility of the egg whites-- one errant puff of wind and the dessert could deflate like a sad balloon. Admittedly, I do find French desserts to be pretty finicky. For instance, I have yet to master macarons or croissants. Soufflés aren't so bad though, especially if you keep a few tips and tricks in mind. Notes are in the recipe below!

This recipe makes a tasty soufflé that is chocolatey without being too sweet. Even better, the batter can hold up for 30 minutes between preparation and baking though I have not tested this. This stability is a good thing, since you will want to serve it immediately out of the oven before it falls flat. Soufflé photography is kind of stressful; the first image was taken about 20 seconds out of the oven. A minute later, it looked like this:


It inevitably sinks before your eyes. At this point, there's nothing left to do but dig in...


The soufflé was light and airy with a soft center and thin, crisp crust. There's still some room for improvement though. For one, I'd prefer the top to be less cracked. I also wanted to get the "top hat" effect, created by running a knife around the perimeter of the ramekin before baking. The cut obviously did not stay while baking since my souffle came out looking more "helmet" than "top hat", but I'll blame the recipe for that. Shh. I guess this means there are more soufflés to bake (and eat) in my future. What a pain.

Recipe after the jump!

8/23/2012

Suspended Animation: Summer Fruit, Elderflower and Prosecco Jelly

I remember watching Jamie Oliver on TV during his Oliver's Twist days, back when he'd zip around London on his scooter gathering groceries and have friends over to cook at his kitchen with the big window in the background. I remember seeing him make this recipe one episode. I had forgotten all about it until recently when I was trying to find a use for the big bottle of elderflower cordial that's been sitting in my fridge. 


I'm sort of obsessed with elderflower drinks. My favourite summer refreshment involves mixing a little elderflower cordial with fizzy water or sparkling wine. It's quite a unique flavour; it's sort of fruity, a little floral, with a hint of a "greenness". Elderflower is probably best in beverages though. I've tried elderflower flavoured chocolate and I swear it tasted like a chocolate bar that's been sitting in a granny's purse for too long (nastily perfume-y). 


This dessert is quick to prepare and fun to eat. The gelatin captures the bubbles so it stays fizzy on your tongue when you eat it. It can be unmolded or served in a glass. I topped the ones in the glasses with some vanilla mousse. I love the berries and cream combination. The cream mixed with the wine also tastes a bit like syllabub.


I tried making a similar dessert involving grape jello and club soda a few years ago. That attempt literally fell flat so I was worried about all the bubbles dissipating again before the jelly set. I was a bit more prepared this time, having done some extra research!

Tips and the recipe after the jump!

1/13/2012

Toasty Cool: Toasted Almond Gelato


Next to pistachios, almonds are my favourite kind of nut. (I'm mildly obsessed with marzipan). They're delicious and nutritious to boot (since apparently, it's a superfood). They also make a great, delicately flavored gelato; like vanilla, but less...ordinary. This is extra rich and velvety since the base is made from eggs and heavy cream.
Of course, you can get top-quality gelato and ice cream from the store. But making it from scratch is not only fun, but nice to be able to adjust flavours and ingredients to suit your taste. Homemade gelato is also usually denser than store-bought ice creams because less air is incorporated during churning.
The gelato can be enjoyed straight from the ice cream maker for a soft-serve consistency or, if you think you have the self-control, can be frozen for something more scoop-able. 

Recipe after the jump

1/04/2012

Crème-y Goodness: Crème Caramel


Crème caramel is a great dessert for entertaining. It can be made ahead of time so you can effortlessly serve it to your guests in all its golden, syrupy glory whenever you need it. This classic dessert is not cloyingly sweet and the smokiness of the caramel gives some edge to the delicate vanilla scent. 
Since this particular recipe uses milk in the custard, it is on the leaner side. If you would like it to be extra velvety and rich, look for a version that uses cream and/or more egg yolks. 


Notes and recipe after the jump...

9/08/2011

Lemon Panna Cotta with Blueberry Sauce


I bring odd souvenirs home with me when I travel. A tube of curry ketchup and a box of coconut "sheets" studded with raisins (to be eaten on toast) from Amsterdam. A little bottle of pandan extract from Singapore. Pearl sugar from Belgium. And, amongst other things, sheet gelatine from Barcelona. This last one is a bit strange, because sheet gelatine isn't even unique to Barcelonan cuisine. It's a little hard to find in North America and I'd never worked with it before, so I thought why not?

I finally used this gelatin to make a simple but sophisticated Italian dessert: panna cotta (or "cooked cream"). It's important to add just enough gelatin to make it set, but not so much that it's bouncy and flubber-like. Heavy cream is used to lend a silky, luxurious texture to the finished dessert. There are dozens of ways to flavour panna cotta, from simple vanilla to earl grey to rosewater. Since I had plenty of great blueberries to make a sauce with, I thought of the classic pairing with lemon. 

Tips and recipe after the jump...

8/29/2011

Sweet Saltines: Toffee Crunch Bars

I love the buttery, sweet, salty crunch of English Toffee. This is a quick way to get a similar result without fiddling with a candy thermometer. It's also the most delicious use for the humble saltine crackers that I know of...

10/28/2010

Where to Eat: Amsterdam (Sweet Edition)

As the days get shorter and my to-do lists get longer (and longer), I find myself reminiscing on those perfect warm, sunny, "do-nothing" summer days. Well, maybe this past summer abroad was a little less "do-nothing" than usual, but I wish I could be back in Amsterdam, sitting by a canal eating a warm stroopwafel. Which brings me to the point of this post: I realize that I had forgotten to chronicle the sweeter half of my Amsterdam food adventure! But better late than never...

Dutch Pancakes-Pannenkoeken

These were at the top of my list of foods to try when in Amsterdam. I grew up eating dutch pancakes all the time at one of my favourite local spots but I had been dying to try the authentic version. These huge pancakes (big dinner plate sized beauties) are almost like crepes, but thicker and eggier. These are not to be confused with Dutch Baby pancakes (a.k.a. German pancakes) which are puffy and similar to popovers or Yorkshire pudding.

Speck and apple pannenkoen

Mine was a little sweet and a little savoury, courtesy of the speck (Dutch bacon) and apple. One of my travel companions ordered a "special" which was essentially a sugar overload. One of these can probably fill you up for the entire day, but save room for dessert because there are many more treats to be savoured...
(I bought a rather hefty box of pannenkoek mix as an edible souvenir. The results didn't taste as good, but at least it was a great way to share my travels with family back home.)

The "Special" (3 scoops of vanilla ice cream, whipped cream, strawberries, chocolate on a huge pannenkoeken...hope you brought your appetite!)

Poffertjes

These are like the pannenkoeken from above, but in baby sizes. I bought these at the Albert Cuypmarkt as part of my "walking lunch." They were a little on the dense and doughy side, but when hot, fresh and covered in chocolate syrup, butter, and powdered sugar these little gems are the perfect bad-for-you-but-delicious street food. They're also quite effective at speeding up post-herring recovery.


Dutch Apple Pie

I had not known that the Dutch were famous for their apple pies, but now I know why. Just look at it! Winkel is probably the best spot in town to see what I mean. The huge slices are deep dish, packed full of juicy tender apples and cinnamon. The crust is the true star though; more of a cookie texture than the typical flaky pastry. It is thick and buttery rich, with a nice sandy texture that stands up to the apples. If you ever visit Amsterdam, go to Winkel!! It is really nice to sit at one of their tables outside and people watch while you enjoy the best pie in town.


Stroopwafels

Thanks to their availability in many well-stocked supermarkets and even Starbucks locations in North America, stroopwafels are no longer completely foreign to, well, foreigners. In their packaged form, they are two thin, waffle-striped cookies sandwiching a sticky caramel in between; completely delicious and addictive. In my continued quest to search for original and authentic Dutch eats, I tracked down a few locations that still produced fresh stroopwafels.
Unfortunately, my first choice, which was a vendor at Albert Cuypmarkt, was not open when I got there. But, ever prepared, my backup bakery Lanskroon was ready and beckoning with its trays of thin, bronzed biscuits oozing with caramel. Because they were fresh, the contrast in texture was more noticeable than in the packaged versions. The cookie remained crisp while the caramel was molten and soft in between. I think I prefer the blending of textures and flavours of the packaged version, which is nice since they're easily accessible even when an entire ocean away.


And on that sweet note, the Amsterdam Where to Eat duo is finally complete!! Not only is Amsterdam an absolutely beautiful city, it has an equally attractive food culture.
(Whatever you do, please just remember to go get yourself some pie!)

Eat Here:

The Pancake Bakery
Prinsengracht 191-A

Albert Cuypmarkt
Albert Cuypstraat 67 HS

Winkel43
Noordermarkt 43

Lanskroon
Singel 385

Images property of beetsandbites

10/03/2010

Brown Swan: Chocolate Raspberry Pavlova

Oh my.


Just look at it.


A thing of beauty, isn't it? Granted, it probably would have been a little prettier if the meringue was still snowy white like a traditional pavlova, but I like the chocolate in it. It gives the pavlova some character. A dark little twist.

The jury's still out on whether the "pav" was originally created in New Zealand or Australia. Wherever its origin, the dessert was created in the 1920s to honor the Russian ballerina, Anna Pavlova, after one of her tours. It was said that the she "does not dance; she soars as though on wings," thus inspiring this delicate, airy creation.

This meringue-based dessert has a light, crisp crust and a meltingly marshmallow-y inside. The balsamic vinegar helps to keep the center soft; you cannot taste it once it is baked. The chocolate pieces remain gooey and molten even after the base cools. The meringue is then crowned with softly whipped cream and scattered with fruit.

Pavlovas are traditionally topped with passion fruit, probably because they are indigenous to Australia and New Zealand. In this version, raspberries are used since their pleasant tartness balances nicely with the sugary meringue. These bright red gems are also a classic pairing with chocolate.

5/31/2010

Profiteroles with Chantilly Cream and Bittersweet Chocolate Ganache


As far as I'm concerned, Pâte à Choux is magic. How else would you explain the miraculous transformation of an uninspired, sticky blob of dough into a hollow, golden and light-as-air pastry? All in the absence of chemical leavening like baking powder or baking soda?


Sure, chefs will tell you that it's the water in the dough that turns into steam in the oven, blowing a large bubble in the center of the pastry, not unlike blowing a bubble gum bubble. But I say it's magic, and I'm sticking to my story.

Profiteroles, croquembouche, eclairs, beignets, French crullers and gougères are all born of the same egg, butter, water, flour mixture called Pâte à Choux. The dough can be baked or fried and stuffed with various fillings.

These are filled with Chantilly whipped cream (sweetened vanilla cream in fancy-speak) and smothered in bittersweet chocolate ganache. While chocolate and vanilla seem like rather "standard" flavours, they are irresistible in this combination. I blame factory produced desserts for the association of vanilla with bland, one-note flavour. Whipped cream with good quality vanilla extract has an incredibly comforting and complex aroma that will make you want to stick your face in the bowl. Don't believe me? I dare you to make these. There is nothing quite like freshly baked choux pastry, richly scented vanilla cream and velvety smooth ganache.

Sweet or Savory Pâte à Choux
Yield: 4 dozen bite sized profiteroles

Ingredients

  • 1 cup water
  • 3/4 stick butter (6 tablespoons)
  • 1 tablespoon sugar plus 1/8 teaspoon salt (for sweet)
  • 1 teaspoon salt (for savory)
  • 5 3/4 ounces flour
  • 1 cup eggs, about 4 large eggs and 2 whites
  • 1 cup heavy whipping cream, whipped with 1/4 cup sugar and 1 1/2 teaspoons vanilla

Directions

Preheat oven to 425 degrees F.

Boil water, butter, and salt or sugar. Add flour and remove from heat. Work mixture together and return to heat. Continue working the mixture until all flour is incorporated and dough forms a ball. Transfer mixture into bowl of a standing mixer and let cool for 3 or 4 minutes. With mixer on stir or lowest speed add eggs, 1 at a time, making sure the first egg is completely incorporated before continuing. Once all eggs have been added and the mixture is smooth put dough into piping bag fitted with a round tip. Pipe immediately into golfball-size shapes, 2 inches apart onto parchment lined sheet pans. Cook for 10 minutes, then turn the oven down to 350 degrees F and bake for 10 more minutes or until golden brown. Once they are removed from the oven pierce with a paring knife immediately to release steam.

Use a piping bag to fill puffs with cream. Fill puffs soon before serving to prevent pastry from becoming soggy.

Chocolate Sauce (Ganache)
Makes about 1 cup

5 oz bittersweet chocolate (or chocolate chips)
1/2 cup heavy cream

Place chocolate in a heatproof bowl. Heat heavy cream in a saucepan until it steams and bubbles form around the edges of the pan. Pour cream over chocolate and let sit for 3 minutes. Gently stir until chocolate and cream are uniformly combined. Cool until thickened, pourable consistency.

To reheat, set the bowl over a pan of simmering water (in double boiler arrangement).

Recipe adapted from Alton Brown and Food Network
Image property of beetsandbites

5/24/2010

Parisian Perfection: Macarons

At first encounter, the macaron seems quite simple. It is a meringue-based cookie made from 3 main ingredients: egg whites, ground almonds, and sugar. Various fillings such as ganache or buttercream are sandwiched in the middle (kind of like an Oreo, but infinitely more sophisticated).

But look a little closer, and the macaron reveals a much more complicated character. The texture of the macaron is an enigma: buttery-smooth center, moist, chewy and airy interior covered by a perfectly smooth, crisp top that is as thin as an eggshell.


It is also clear that the macaron is not your typical "milk and cookies" kind of confection. Culturally speaking, it seems that macarons have exploded in popularity in recent years, surpassing the cupcake as the darling of the foodosphere. It is a generally accepted fact that Paris is home to the finest specimens in the world (macarons are French, after all). Pierre Desfontaines of Ladurée is credited for creating the macaron as we know it (the sandwich cookie variety). Today, Ladurée still bakes up thousands of them daily in an impressive array of flavours and colours from liquorice and orange blossom to rose and bergamot. Of course, Ladurée is not the only purveyor of these petite sweets; Lenôtre, Gérard Mulot, Dalloyau, and Pierre Hermé are just a few other fine French patisseries that offer excellent macarons. Luckily. the recent popularity of macarons means that you do not have to live in France to be seduced by these beautiful and elegant treats. It's likely that you could find them at a local bakery. You can even try your hand at making them at home!


This is my second attempt at these. My first was about 3 years ago and I was not aware of the little details that are required to make these work. Needless to say, the resulting pans of sad looking little egg white blobs weren't exactly a hit. This time around, I was armed with new tricks and things worked out much better. I kept things simple by making the shell one colour, and using two flavours of fillings (chocolate and raspberry buttercreams). I accidentally toasted the ground almonds while trying to dry them out, which led to a nuttier flavoured cookie, and a darker, cream colour rather than snowy white (or whatever colour you'd choose to tint them). While the ingredient list is deceptively simple, there is a degree of technique involved in making these! I have included many tips below, and with practice, there is nothing to stress over. Make sure you can set aside 5-6 hours to make these (don't worry, there's a lot of "resting" time).

The method is rather unusual, yet clever. By letting the piped batter sit for two hours before baking, the confectioner's sugar dries to form the characteristic thin shell. When the batter is baked, the shell rises and the liquid center pools out underneath to form the ruffled "feet." (I danced around the kitchen when I saw the "feet" through the oven door. Is that weird? No?) Clearly, the sky's the limit when it comes to variations, and I cannot wait to try different flavours in the future! Curious to give it a try? Well, without further ado, here's the recipe!


8/24/2009

Devilishly Delicious: Raspberry-filled Cupcakes with Whipped Chocolate Ganache

I like cupcakes; I think they're a happy sort of food. That requisite swirl of frosting is just so decadent looking. Unfortunately, the icing can be so sugary that it makes my teeth hurt just thinking about it. These ones are deeply, darkly chocolate. I think chocolate ganache is my new favourite cupcake topping. Whipping it allows you to pipe it as nicely as any frosting, but it's more sophisticated and less sugar-packed than true icing sugar frosting, and it's faster to make than buttercream. It tastes almost truffle-y.

The base is a devil's food cake. This is an old family recipe that makes a very dark, moist chocolate cake very quickly. You can see that the directions pretty much read like they do off a box of cake mix. The terribly difficult part is measuring everything into one big bowl. If you've got measuring equipment, there's no reason to make cake out of a box when this is SO easy.

Chocolate ganache should be simple. It has two ingredients: chocolate and cream. This magical mixture can be made into truffle centers, poured as a glaze, whipped into mousse, or piped as frosting. It all depends on the ratio of cream to chocolate. I was faced with a challenge though when I chopped up a half pound of good 70% dark chocolate and made it into ganache, only to find out that there really is such a thing as "too dark." The ganache was not sweet at all, and almost offensively bitter. I looked online to determine how to sweeten ganache that's been made and cooled, but no luck.

I believe that food can sense your fear, so if you take charge, things tend to turn out better. Still, chocolate can be quite temperamental: add a drop of water to melted chocolate and it will seize, heat it too much and it'll split. So I was hesitant to beat in a few tablespoons of corn syrup, but was relieved to see that it worked. Adding a dab of raspberry preserves to the center of the cupcake resulted in a delicate balance of bitter and sweet, creamy and cake-y, chocolately and fruity. Adorn the tops with fresh raspberries and present with a flourish.

Raspberry-filled Chocolate Cupcakes with Whipped Chocolate Ganache

1 recipe Devil's Food Cake, baked into cupcakes
1 recipe Whipped Chocolate Ganache
1/2 cup seedless raspberry preserves
Fresh raspberries for garnish

Make a hole in the center of each cupcake: Use a large metal star tip (from a piping bag); push into cake and twist. Remove the center of the cut out.

Use a piping bag to fill each hole with raspberry preserve. Use a large star-tipped piping bag to pipe a swirl of ganache on each cupcake. Decorate with raspberries.

Store in the fridge, up to 3 days. Serve at room temperature.

Makes 20 cupcakes

Devil's Food Cake

1 1/2 cups all purpose flour
1 1/4 cups sugar
1/2 cup cocoa
1 1/4 teaspoon baking soda
1 teaspoon salt
1 cup buttermilk
2/3 cup oil
1 teaspoon vanilla
2 eggs

Heat oven to 350F. Grease and lightly flour 2 8" cake pans (or 20 lined muffin tins). In a large bowl blend all ingredients at low speed until moistened. Beat 3 minutes at medium speed. Pour batter into prepared pans and bake for 25-30 minutes (20 minutes for cupcakes) or until toothpick inserted in the center comes out clean. Cool 5 minutes before removing from pan.

Yields 2-8" layers or 20 cupcakes.

Whipped Chocolate Ganache

2 1/2 cups heavy whipping cream
1 pound bittersweet chocolate, chopped (~60%; anything higher and the ganache gets very bitter)

Place chopped chocolate in a medium bowl. In a medium saucepan, heat whipping cream to a boil. Boil for one minute (important to evaporate some water). Pour cream through a sieve over chopped chocolate. Do not stir; allow to sit for 2-4 minutes. Use a spatula to gently stir in concentric circles (start in the center of the bowl and stir outwards) until thoroughly mixed.

Place plastic wrap directly on top of ganache to stop a film from forming. Allow to cool to room temperature, about 3 hours.

Whip at medium-high speed until lightened in colour and fluffy. Do not overbeat or ganache will get grainy (to fix grainy ganache, melt the whole thing down, cool, and beat again).

Makes about 2 1/2 cups; enough to frost 24 cupcakes

Note: To fix ganache that's too bittter, beat in 1-2 tablespoons of corn syrup

Ganache recipe adapted from marthastewart.com
Cupcake and cake recipe and image property of beets and bites

8/18/2009

Fit for the Queen: Victoria Sponge and Triple Berry Trifle

I was blog surfing when I came across a British one called "How to Make Cakes." There, I found a lovely recipe for Victoria Sponge that promised to be simple and delicious. I've never had Victoria Sponge, and it's not easy to find any in the area, so the best way for me to see what it tastes like is to actually make it. Besides, a "toss-everything-in-a-bowl-and-stir" cake that promises to be light and fluffy? This, I had to try.

I was surprised at how well it turned out. The eggs made the cake very flavourful and it was very tender. It's not what North Americans would call a "sponge cake"; it's more of a cross between butter cake and pound cake. Traditionally, jam and cream is sandwiched between two tall layers, but I had other plans instead...

One of my favourite English desserts has to be the trifle. I also think it's the perfect dessert to bring to potlucks for several reasons:
It's "make ahead" and tastes better the day after it's made.
It's assembled in a bowl so transportation is easy (a buttercream layer cake sliding around in the car in the summer heat=tragedy waiting to happen).
It looks pretty and pretty impressive.
It's not too heavy and rich after a big meal.
It can be adjusted to serve a few or many people.
And nobody can resist cake, berries, and cream.

There is much debate over what goes into the trifle bowl. Generally speaking, trifle consists of cake, cream, custard, spirits and fruit. There are hundreds of recipes and combinations out there, but in the height of summer, I like to make a simple, lightened version with tangy lemon curd and lots of fresh berries. However, the Victoria Sponge cake made it a little heavier than usual. If you try making trifle with chiffon or sponge cake and don't sog it down too much, the dessert could just float away...

Lemon Triple Berry Trifle
Serves 15

1 pint each: strawberries (halved and then sliced), blueberries, raspberries
3 tablespoons sugar
2 tablespoon lemon juice

2 cups whipping cream
2 teaspoons vanilla extract
3 tablespoons icing sugar

1 recipe of Victoria Sponge (or pound cake, or sponge cake, if desired)
1 recipe lemon curd (about 1 1/2 cups), thinned with a tablespoon of whipping cream if necessary

In a large bowl, combine berries, sugar, and lemon juice. Stir and macerate at room temperature for 30 minutes.

In a large chilled bowl, whip cream on high speed with an electric mixer until billowy and soft. Add vanilla and sift in icing sugar. Continue whipping until soft peaks form.

In a deep glass bowl, place a layer of cut up cake. Top with half the berries and drizzle juice on top. Make sure some berries are pushed to the side of the dish so you can see them through the side. Drizzle with lemon curd and then cover with a layer of whipped cream. Repeat layers, ending with a layer of whipped cream.

Decorate the top with whole berries (toasted flaked almonds are nice too). Cover and refrigerate at least 8 hours.

Victoria Sponge (http://www.howtomakecakes.co.uk/2007/09/back-to-victoria-sponge.html)

Ingredients
285g Self-raising flour
2.5 teaspoons (12.5ml) Baking powder
285g Margarine
285g Caster Sugar
5 Eggs
Raspberry or Strawberry Jam

Buttercream Ingredients
150g Softened Butter
340g Icing Sugar
3 tablespoons (45ml) Warm water

Equipment required
2 greased 8-inch sandwich tins
Sieve
Large mixing bowl
Electric whisk

Cake
- Sieve the flour and baking powder into a large bowl
- Add all the other ingredients into the bowl
- Using an electric whisk beat the ingredients together, starting slowly then medium until you get a smooth, creamy consistency
- Divide the mixture between the two sandwich tins and bake at 170 degrees centigrade (340 degrees Fahrenheit) for 30-40 minutes. The cake should be springy to the touch.
- When cooked immediately turn out onto a wire rack.

Buttercream
- Soften the butter and beat until smooth
- Gradually add the icing sugar, beating well
- Add the water and beat until smooth

Spread some jam on one half of the sponge and buttercream on the other and sandwich together. Sieve icing sugar on top

Tips
My tips for a good Victoria Sponge are:
1) Use good quality 8-inch sandwich tins. Line them with greaseproof paper to avoid the cake sticking
2) If you have a fan oven, do not use the fan feature. Cakes cook much better on the traditional oven setting
3) Be careful not to use too much jam or buttercream otherwise the cake may slide apart when sandwiched together. Do however spread the jam and buttercream to the edge of the sponges as this will enhance the appearance of the cake
4) When turning out the cakes onto the wire rack, try turning one out onto a solid surface (like a chopping board) and then put it on the wire rack so that the top of the cake does not get the marks from the wire rack. This will make it look much better.

Lemon Curd:
Yields 1 1/2 cups

3 large eggs
1/3 cup fresh lemon juice
1 tablespoon finely shredded lemon zest
3/4 cups sugar
4 tablespoons unsalted butter, cool and cut into small pieces

In a stainless steel bowl placed over a saucepan of simmering water, whisk together the eggs, sugar, and lemon juice until blended. Cook, stirring constantly (to prevent it from curdling), until the mixture becomes thick (like sour cream or a hollandaise sauce) (160 degrees F or 71 degrees C). This will take approximately 10 minutes. Remove from heat and immediately pour through a fine strainer to remove any lumps. Cut the butter into small pieces and whisk into the mixture until the butter has melted. Add the lemon zest and let cool. The lemon curd will continue to thicken as it cools. Cover immediately (so a skin doesn't form) and refrigerate for up to a week.


Victoria Sponge recipe courtesy of Mark Sanford and How to Make Cakes
Lemon Curd recipe courtesy of Joyofbaking.com
Image and trifle recipe property of beets and bites

8/11/2009

Where to Eat: Barcelona...Sweet Edition

If you've got a sweet tooth, Barcelona is a hazardous place to be. They take their sweets seriously (churros and chocolate for breakfast, anyone?) and there seems to be a "pasteleria" (pastry shop), candy or ice cream store on every corner. Here are some of my picks:

Pasteleria Escriba
Located right on the bustling La Ramblas, this beautiful bakery is a must visit for all pastry lovers, if not just for the gorgeous exterior. The Escriba family bought the location in 1986 and it has since become one of the most highly regarded bakeries in Barcelona. They make an especially delectable Coca de Llardons.


Bubo
These beautifully decorated treats beckon from their glass cases, reminiscent of a display at a jewellery store. I sampled a delicious pistachio macaroon and a "parfait" of sorts. Layers of green tea mousse, orange marmalade, streusel, and tangerine "caviar" make for a zesty dessert (I got to keep the glass too!) There's a Bubo Bar serving savoury food next door, in case you need to curb that sugar rush.

Cacao Sampaka

Attention adventurous chocoholics: If you're looking for chocolate that's a little "different," head to Cacao Sampaka and sample their "Innovaciones Gastronomicas" collection. Expect to find Hot and Spicy, Balsamic Vinegar, Parmesan Cheese, or Soya chocolates. I thought they were all pretty good, although the parmesan one was pushing it a little. If you just want a good ol' bar of solid chocolate goodness, they've got that too. They also have a small cafe in the back serving, of course, all things chocolate too.

Things to eat:
There are lots and lots of Catalan sweets, but sadly I didn't have time to sample all of them. Here are just a few:

Coca de Llardons
A pastry (made with lard. Mmmm) sprinkled with sugar and pine nuts. It's super crunchy with a "crust" of sugar. And at around 2 euros, it's the perfect thing to munch on as you roam.

Crema Catalana
A cross between flan and creme caramel. It's got a creamy custard base and a crispy caramel crust. It's a little lighter tasting because it only uses milk, although it makes up for that fact by only using egg yolks, too.

Torta de Santiago
A traditional almond cake. It's dense and crumb-y, with an icing sugar St. James cross stenciled on top. My slice was served with a sweet wine to dip each tasty morsel into.

Eat Here:

Pasteleria Escriba
Rambla, 83

Bubo and Bubo Bar
Caputxes, 10

Cacao Sampaka
Consell de Cent, 292


Images property of beets and bites

7/30/2009

Green Tea Ice Cream: Good and Good For You (sort of...)

My tea of choice is definitely green tea. For one thing, it is packed with health benefits; it's rich in polyphenol antioxidants, linking it to better heart health and reduced cancer risk. But the added bonus is its refreshing fragrance and grassy green flavour. True, eating ice cream may not be the most sensible method of consuming green tea, but if you're going to indulge, it may as well be a flavour that tastes delicious and at least appears healthy. It's my preferred form of green tea in the summer heat anyways.

Normally, green tea ice cream is made with matcha. The powder creates the characteristic bright green colour. I find matcha a little difficult to find and on the expensive side, so I was delighted when I came across this recipe that used tea bags (or loose tea) instead. While you don't get that vivid green, the flavour is nearly identical if you use enough tea leaves and steep overnight. I used the freshest and highest quality tea that I could find. Try to use loose tea if you can get it; the flavour will be better because the tea can circulate more easily.

I reduced the sugar a little and used a lighter honey to ensure that the delicate tea flavour remains the focus. I also cut the egg yolks down by one because the custard was already rather rich. All the sieving and chilling are necessary steps to make the smoothest ice cream (straining removes stray tea bits and possible curdled egg, and the chilling makes for finer frozen crystals). The cream and egg yolks keep the frozen goodness silky smooth. It serves very nicely straight from the freezer, whether you choose to dish it or just dig in with a big spoon.

Green Tea Ice Cream (made with tea bags)

Ingredients:

1 1/2 to 2 cups milk (see Note)

2 Tbs. loose green tea or 6 green tea bags

1 1/2 cups heavy cream

4 egg yolks

1/2 cup sugar

1 1/2 Tbs. honey

Directions:

In a heavy 2-quart saucepan over medium heat, warm the milk until bubbles form around the edges of the pan, about 5 minutes. Remove from the heat and stir in the loose tea or submerge the tea bags in the hot milk. Let cool to room temperature, then cover and refrigerate for at least 4 hours or up to overnight.

Strain the milk through a fine-mesh sieve into a bowl or remove the tea bags from the milk, gently squeezing them to extract their liquid. In a heavy 2-quart saucepan, combine the tea-infused milk and 1 cup of the cream. Cook over medium heat until bubbles form around the edges of the pan, about 5 minutes.

Meanwhile, in a bowl, combine the egg yolks, sugar and the remaining 1/2 cup cream. Whisk until the sugar dissolves. Gradually whisk about 1/2 cup of the hot milk mixture into the egg mixture until smooth. Pour the egg mixture into the saucepan and add the honey. Cook over medium heat, stirring constantly with a wooden spoon and keeping the custard at a low simmer, until it is thick enough to coat the back of the spoon and leaves a clear trail when a finger is drawn through it, 4 to 6 minutes. Do not allow the custard to boil. Strain through a fine-mesh sieve into a bowl.

Place the bowl in a larger bowl partially filled with ice water, stirring occasionally until cool. Cover with plastic wrap, pressing it directly on the surface of the custard to prevent a skin from forming. Refrigerate until chilled, at least 3 hours or up to 24 hours.

Transfer the custard to an ice cream maker and freeze according to the manufacturer's instructions. Transfer the ice cream to a freezer-safe container. Cover and freeze until firm, at least 3 hours or up to 2 days, before serving. Makes about 1 quart.

Note: If using loose tea, you will need to use 2 cups milk; if using tea bags, use 1 1/2 cups milk.

Recipe adapted from Williams-Sonoma Ice Cream

Image property of beets and bites

7/17/2009

Return of the Soupspoons Sunset (Canneles de Bordeaux)

Once upon a time there was a cafe and a young girl. This cafe was called "Soupspoons" and served French bistro-style soups and sandwiches. They also had a well-stocked pastry case. The girl visited every so often and loved a particular dessert called "Sunsets." These little domed disks were not quite cake, nor cookie, nor crepe, but somehow a combination of all three. They had a chewy, deeply caramelized crust and a vanilla scented, crepe-y interior.

One day, the cafe closed. The girl was sad that she couldn't buy the Sunsets anymore. Being an (anonymous) foodie, she went on a search for the recipe. As it turns out, the dessert was a Soupspoons original and the recipe was nowhere to be found. Defeated, the girl gave up her search.

A few years later, the girl flips open a baking book and finds a recipe for canneles. Intrigued, she reads on and realizes that the Sunsets that she so loved may have been related to these finicky French pastries. And so she begins her journey to bake the perfect cannele and perhaps recreate the Sunset...

OK, so maybe not the perfect cannele. Because, as many French pastries are, they are notoriously difficult to get right. For one thing, the tins are supposedly coated in beeswax to produce a crisp crust. Then, they often pop out of the molds while baking so the bottom does not brown properly. Apparently, some bakers in Bordeaux have given this phenomenon the charming name of "white asses" (their words, not mine). They take two days to make because the flour must hydrate overnight. There are entire forums devoted to cannele baking, from the perfect mold to use (silicon? aluminum? copper? tin?) to the best mixing techniques.

I was intrigued. These little cakes had no leavening, and each tiny portion is baked in a 400F oven...for an hour. I was also a little intimidated, but this project was more for fun than anything else.

I didn't have proper cannele molds so I baked them in some small brioche tins instead. Surprisingly, they did not blacken to a crisp after baking. Once cooled, the outside is very crunchy and caramel-y, and the inside remains a little custardy, and a little chewy.

They are supposed to be consumed within 8 hours of exiting the oven, but I tried one the next day and they actually did taste a lot like Sunsets. The crisp exterior was now chewy and spongey, and retained that wonderful deep burnt sugar taste. The recipe for the Sunset will remain a mystery, but maybe it was a version of a (stale, but really great) cannele after all.

I actually do not know what a cannele really should taste like so I don't know if my experiment was a success. I thought these were pretty tasty, but I'll pick up an authentic specimen next time I'm at a French bakery. But for your reference, this is what they are supposed to look like:


And this is a "Sunset":
Canneles de Bordeaux:

Makes 10-11 canneles:

2 cups whole milk
2 tablespoons unsalted butter, chilled
3/4 cups cake flour
Pinch of salt
1 cup less 2 tablespoons superfine sugar
4 extra-large egg yolks
1 tablespoon dark rum
1 teaspoon vanilla extract
"White Oil" (see note)

1. Heat milk in a saucepan over low heat to 183F.

2. Pulse butter, flour, and salt in a food processor until combined. Add sugar and pulse once or twice to mix.

3. Add egg yolks and process until the mixture begins to tighten.

4. With the motor running, quickly add the milk in a stream. Strain through a fine-meshed sieve and press through any congealed egg yolks. Stir in rum and vanilla. Cool to room temperature and store in the fridge for 24 hours.

5. 6-7 hours before serving, brush the molds with white oil and set crown side down on a tray. Freeze for 30 minutes.

6. Heat oven to 400F. (375F if using convection oven)

7. Place chilled molds 1 1/2" apart on the sheet. "Paddle" the batter with a spatula to recombine and fill molds almost to the top. Bake on the bottom rack of the oven 1 3/4 to 2 hours (until deep brown or, if desired, almost black) (Bake for 1 hour 15 minutes if using convection).

8. Remove molds from oven and unmold immediately (firmly rap the crown against a hard surface. If cannele sticks, return to oven for 5-10 minutes, or use a knife to help). Cool completely before serving.

Note: To make white oil: Melt 1 ounce of beeswax in a 1 pint glass measuring cup. Melt in the microwave and stir in enough safflower oil to make a whitened liquid, thin enough to coat the back of a spoon. Cool to room temperature and store at room temperature in a glass container.


Credit to Paula Wolfert

Image property of beets and bites, mimiofparis.com, and evalu8.org (in order of appearance)

6/19/2009

What do you get...


...when you blend cream cheese, whipped cream, cake, and coffee?
Possibly the most delicious dessert ever to come from that boot-shaped country, Italy.

Interestingly, tiramisu is a dish that actually originated in the country that it is associated with--Italy (Treviso, to be precise). (For examples of "impostor" dishes, see chicken parmesan, chicken tikka masala, and fortune cookies). The dessert is traditionally composed of a velvety custard layered with sponge cake soaked in espresso and alcohol, granting it the name "Tiramisu" or "pick me up."

One defining ingredient is mascarpone cheese. It is decadent in every way: buttery (it is a triple cream cheese), velvety smooth, delicately flavorful, and... expensive. One tub can set you back $10. I will be making a version that is a little more wallet and waistline friendly (if only marginally).

Since I have had a hankering for a big bowl of this creamy goodness all day, I highly doubt I will have the discipline to wait for it to sit in the fridge overnight. This express version I am making does not use whipped eggs for the zabaglione custard, and substitutes light cream cheese (boosted with good quality vanilla) for the mascarpone. I am not claiming that it will be identical to Italian restaurant quality ones, but once assembled and laced with espresso and Kahlua, no one would be the wiser...

Express Tiramisu

Serves: 8

  • 1/2 pound light cream cheese, softened (1 ~ 8 ounce packages)
  • 1 cup sugar
  • 2 tablespoon milk
  • 2 teaspoons vanilla
  • 2 tablespoons brandy
  • 1 tablespoon instant espresso
  • 1/4 cup room temperature water
  • 3/4 cups Kahlua
  • 2 cups heavy whipping cream
  • 7 ounces ladyfinger biscuits
  • 1/4 cup cocoa powder


  1. Lightly spray 9 X 9 inch glass Pyrex baking dish with vegetable spray.
  2. Count the ladyfingers and divide in half.
  3. Spoon cocoa powder into a sugar shaker, or when ready, use a small strainer or sieve.
  4. Using beater attachment of a high-speed mixer, beat softened cream cheese and sugar on medium to high speed until smooth and creamy. Add milk, vanilla and brandy. Beat again until fluffy. Transfer to large mixing bowl and set aside.
  5. In a small bowl, dissolve instant coffee in room temperature water. Add Kahlua, stir and set aside.
  6. Whip heavy whipping cream on high speed until stiff. Fold whipped cream into cream cheese mixture with spatula and blend well.
  7. One at a time, quickly dip only the bottoms of the ladyfingers into Kahlua. Place the soaked side down and line the entire bottom of the pan with ladyfingers. The ladyfingers soak up the Kahlua very quickly, so be careful not to dip them too long. Just the bottom half should be dipped in Kahlua.
  8. Spread half the cream cheese over the ladyfingers using an off-set spatula or plastic spatula.
  9. Sprinkle or dust with 1/4 cup cocoa.
  10. Repeat with the rest of the ladyfingers in Kahlua and place on top of the cream.
  11. Spread the remaining cream cheese mix evenly on top.
  12. Sprinkle remaining cocoa over the tiramisu.
  13. Cover loosely with plastic wrap and chill for 6 hours or overnight. You may need to use a few toothpicks to keep the plastic from sticking to the tiramisu.
  14. Use a sharp, thin knife to cut into pieces. Dive in.
  15. Refrigerate any leftovers.
Adapted from: http://bakingdesserts.suite101.com/article.cfm/easy_kahlua_tiramisu_recipe

Image: Property of beets and bites